Tuesday, April 17, 2012

Heirloom Carrots - a bumper crop!


I recently received a picture of the baby in Hamburg decked out in his new duds.  He's so beautiful, and the parents were very happy to receive our handknit goodness.  So happy, in fact, that they called us.  Twice.

The weather has been a bit gloomy and wet, no surprise there, so I've been spending time indoors knitting for the newest babies.  With Moonshine's help, I've been cranking out some little gifts for babies in hot climates and the new babies of Einstein's co-workers.  If that sounds like a lot of babies, believe me.  It is.

This past year has been a bumper crop of babies.  They are sprouting up all over the place.  So I had to think fast and knit fast.  What to give a bumper crop of babies?  A bumper crop of carrots!

Despite the overwhelming number of carrot patterns out there, I couldn't find one that was just right.  They were either too large or too flawlessly perfect.  I wanted something that looked a little more organic, like an heirloom variety.  So I made my own pattern.  Each one is knit with superwash wool and has a little rattle nestled inside.  They are so sweet I could eat them up!

I hope you enjoy the pattern.  If you make one, I'd love to hear from you.  You can also find this pattern on Ravelry or download a pdf version of this pattern HERE.

Heirloom Carrot

Materials
• US #3 (3.25mm) DPNs
• crochet hook, size US #G (approx.)
• small amounts of worsted weight yarn in orange and green
• stuffing
• rattle (optional)
Carrot
CO 12 stitches and divide evenly on 3 dpns.
Place marker, join, and knit one round.
Round 2: *K2, Kfb* repeat to end (16 sts)
Round 3: K even
Round 4: *K1, kfb* repeat to end (24 sts)
Knit even until piece measures 1.5 inches from CO edge.

Decrease 3 stitches evenly (or randomly, like a real carrot) on next round. (21 sts)
Knit 3 rounds even. Decrease 3 sts. on next round. (18 sts)
Knit 5 rounds even. Decrease 3 sts on next round. (15 sts)
Knit 3 rounds even. Decrease 3 sts. on next round. (12 sts)
Knit 3 rounds even. Decrease 3 sts. on next round. (9 sts)
Knit 5 rounds even. K1, *K2tog* repeat to end. (5 sts)

Adjust stitches onto one dpn, and switching to i-cord, knit one row.
Next round: K1, *K2tog* to end. (3 sts)
Then K 2 rounds even in i-cord.
Cut yarn and thread through remaining stitches to close.

Finishing and Greens
Stuff carrot body through the top, inserting rattle if desired, and close hole.
With crochet hook and green yarn, pick up three stitches across middle of carrot top. Slip to close, ensuring that the greens are firmly attached and making sure to leave one stitch on your hook.

Ch 20-25 sts and turn, sc your way back down to the carrot body, randomly skipping multiple sts to make the greens curl. The greens should be rascally and wild, so just have fun with it.
Slip to close in the carrot top, and repeat above two or more times, as desired. Weave in ends.
A note about gauge: Just make sure your stitches are tight enough so the stuffing doesn't show through.


Monday, April 16, 2012

Out and about


 Our car finally came back from the shop-- it had been there an entire month getting primped up with flashing lights and other gizmos so it would pass British car inspections.  I cannot even put into words how happy we were to see our car again.  To celebrate, after a desperate trip to the grocery store, we took the weekend and went exploring.  It was so nice to get out again!

On Saturday, we went downtown.  We live on the edge of a fairly large town, but for some reason, we still hadn't been to see what it was all about.  Probably too busy fighting mold and trying to keep warm.  Since Moonshine is in the midst of a local geography lesson, we decided it was time.  It turns out there was much to see.  So much, in fact, that we didn't quite see it all.

Our city, like every other city in England, is ancient.  It dates back to the bronze age.  It has its share of preserved medieval buildings, including a few gates left from the old city wall.


We got a bit distracted by a huge museum downtown.  We wandered inside just for a minute, and an hour passed.  I didn't take many pictures, as my camera is eating batteries like candy lately, but it was filled with all kinds of memorabilia through the ages.  Kitty Bill was a bit taken with all the cars on display.  Sunburst and Moonshine loved the part where everything was decorated like you were transported back in time-- old buildings and shops, mannequins in period clothing, horses and carts, bicycles... The lights were dimmed so that everything looked somewhat real.


There was a part with an air raid siren, and Kitty Bill and I got a bit spooked out, but luckily it was over fairly quickly.  And there wasn't too much to have to explain to the younger kids about it.  It could have been much worse.

On Sunday we went for a drive to see some houses for rent.  We're actively looking for a place that suits us better.  We didn't find it, but we did come across seemingly endless fields full of Rapsblume, or canola, as it's called in the US.  I don't know what they call it here yet, but I have to tell you, it's my absolute favorite flower.

I unwittingly forgot to bring my camera along on this walk, so you'll just have to take my word for it when I tell you that it was an absolutely amazing sight to behold.  It was more lovely than anything I have yet to see in England.

We had fields full of Raps near where we lived in Switzerland, and they were a familiar sight as we drove all across Germany a few years ago.  They smell like fresh beeswax, and they're so neon yellow that they truly glow.  It's impossible to not feel happy next to a field full of them, and while we were easily reminded of them and transported back to Switzerland for a few minutes, this was clearly better.  Because it wasn't just one or two fields.  When we climbed to the rise above the field, we could see them glowing in the distance.  The Rapsblume spread around us far and wide, it was like being suddenly dropped on the set of the Wizard of Oz, where the Raps were both the yellow brick road and the poppy field all rolled into one.

If we get a bit of sun next weekend, we're surely going back.  This time I won't forget my camera.

Meanwhile, Kitty Bill and I collected some feathers and a few Raps that we found on the footpath. Bonus points if anyone can tell me what bird the feathers on the left came from.


Thursday, April 12, 2012

Hope springs eternal

An unlikely friendship - Cricket with Ronia, the rat

It has been an emotional week.  I've been searching for the right words, both within myself and without.  Searching for the good, trying not to focus on the bad.  Trying to crest each wave instead of being dragged under.  Such is life, and I fear I've swallowed a bit of water in the process.

To cap the emotional tide, we lost a pet.  Ronia, our beloved rat, passed away in Sunburst's hands.  It's awful to lose a pet, but it is something else to watch your child grieve as she comforts her pet in the final moments of its life.  Sunburst is a brave and strong soul with heart of gold.  As a mother I couldn't be more proud of her, but my heart aches all the same.

Ronia was an old rat with a sweet disposition.  She had suffered at least two strokes since January, which left her unable to keep her balance and walk correctly.  She had lost her sight and her sense of smell, and she had difficulty breathing.  But despite all these seemingly huge obstacles, she hung on for months.  She was a fighter and a lover.  She loved to cuddle-- not only with Sunburst, but with our cat Cricket.

I would be remiss if I didn't recognize that all three of our children are grieving, though each in their own way.  And yet, even in the midst of sorrow, the sun emerges.  The flowers bloom.  Life goes on, and the living forces are renewed.  It's the eternal lesson of spring.

There is still so much to be thankful for.

Thursday, April 05, 2012

Waldorf Doll Hospital - part 3

This is part 3 in a series where I take two very old and bedraggled Waldorf dolls and try to bring them back to their original forms.  Click here for Part One and Part Two.

* * * * *

We woke up yesterday to harsh winds and a chilly, wet world.  It seemed colder than usual, but I was still surprised to see mammoth-sized snowflakes whizzing through the air.

The gas boiler has been shorting itself out again, which is probably for the best since utilities costs are astronomically high in England.  So the kids and I hunkered down on the couch, wrapped ourselves in blankets and cats to keep warm, and spent the day reading stories, drinking tea, and doing handwork.

If nothing else, it's perfect weather for handwork.  And I know a doll who has been waiting patiently for a new head of hair.


Rosey's old hairdo was very short, just like Sunburst's was when I brought Rosey to life for her.  In fact, Sunburst didn't have hair that reached past her shoulders until she was about seven or eight.  For a time I didn't think it would ever grow, but she surprised me, like she always does.  Finally her hair grew and grew and grew into a thick, almost unmanageable mane.  She wears it in a ponytail because otherwise we'd have to make the doorways bigger.  ;)

Sunburst thought long and hard about whether or not Rosey's hair should change, too.  She finally decided that she wanted it a little bit longer than shoulder length.  When she didn't change her mind all week, I knew she meant it.  So yesterday I pulled out the mohair balls and got to work.

First I found a book with a slick cover that was the right length.  I wrapped the mohair around and around fairly thickly.  I used about 3/4 of a 40g ball for this underlayer.  (For long hair I would have used the entire ball and a larger book.)


I found a sewing thread that didn't offer too much contrast, and then Sunburst and I searched for some tape.  It's the key to sewing doll hair on your machine.  It keeps the hair in place and the feed moving nice and easy.  The right tape simplifies the whole process.

You want to be able to tape the hair in place, run it through the machine, and then remove the tape. Masking tape is a good choice when it comes to sewing hair because it's not too adhesive.  Removable highlighter tape would probably be perfect.  I had neither, and because our car has been in the shop for almost a month, I had to make-do with what I had-- address labels.  I tested them out and they were a bit too sticky, so Sunburst and I applied them to our hands repeatedly until they lost some of their adhesiveness.  Then I applied them to one side of the hair (where I would run stitches for bangs), flipped the book over, and ran them along the other side.  I slid the hair off the book, and ran it through my machine.


We used the same book and the same amount of mohair for the overlayer, only this time, we put the "tape" on one end of the book.  I cut the yarn at the other end, and carefully applied "tape" to the underside of the hair.  This would be the center part.  I ran it through the machine, Sunburst picked off the tape, and then it was ready to go.


I pinned it on, and we had a good look.  It was an awful lot of hair-- a huge change for Rosey.  But all things considered, maybe it wasn't too far-fetched.  For fun, I asked Sunburst to take her ponytail out, and then I had a healthy laugh at the sight of the two of them together.


Sunburst helped sew on Rosey's new locks, and then she spent some time at the sewing machine working on a new dress.  She has become quite handy with the machine lately, so I expect this will be the first of many new doll dresses in the coming months.


Now the dolls are finally finished!  Are you ready for the happy ending?

Here are my girls with Rosey and Ella, then and now...


 As far as happy endings go, it doesn't get much happier than that!


Tuesday, April 03, 2012

Waldorf Doll Hospital - part 2

This is part two of a story in which I tell how I sucked in my breath, gathered my courage, and tried to fix my children's well-loved, yet horribly damaged Waldorf dolls, Ella and Rosey.  If you missed part one of this story, you can find it here.

WARNING: The below post contains potentially frightening images.  If you're my daughter Sunburst, turn back now.  DO NOT read this post or casually glance down the page unless you want to see exactly what I did to fix your doll... and I assure you, you don't!

*     *     *     *     *

I'm so sorry to have left you all on a cliff hanger, dear friends.  I wish I could have finished the story right away and let you know that everything turned out all right in the end... but I wasn't at the end yet.  I was still sewing and fixing and praying right along with you.

So where was I?  Oh yes, Rosey.  Dear, sweet, bedraggled Rosey... I had no idea how I was going to fix her terribly worn head, just that I had to do something.  It really was a complete leap of faith.


I set her down and picked out the stitches that held on the remnants of her hair, and then gave her one long, last look. Sunburst had implored me that I leave her head as intact and unchanged as possible, and yet, she wanted the neck strengthened at the same time.  Keep the head shape, fix the neck.  Talk about impossible!

The sturdiness of a Waldorf doll's neck depends solely upon the structure of her head.  When I created Rosey, I didn't really understand what I was doing.  I hadn't even seen a Waldorf doll outside of a catalog.  I only had a pattern, a bag of wool, and some fabric to go on, and so I ended up not making the head very firmly, and after a fair bit of play, things got a little wonky.  Her chin line and neck line ended up in two different locations. She was still loveable and sweet, but not the most well-crafted doll ever.

To give Rosey the firm neck she deserves, I had to take drastic measures.  In order to do what Sunburst wanted me to do most of all, I had to do exactly what she didn't want me to do.  I had to rebuild Rosey's head.  There was really nothing else I could do. 

I cringed as I carefully cut off the torn and loose fabric of her face.  I cut around her eyes and mouth, leaving just a little bit of skin there, as well as the stitching in the back where the embroidery thread had gone through.  Her features were as preserved as I could keep them.


I cut the line at her neck, and then cut her eyeline and chin line.  All that shaping was gone in an instant.  I was so scared that I was causing irreversible damage at this point that I don't even think I was breathing.  I peeled back the stockinette that encapsulated her head like fascia, and then I held her head together with one hand as I used my other hand to carefully wrap large strips of new wool batting around her.  By then her head looked enormous, and I had to call Einstein to come and help tug her original stockinette back over her head while I held everything in place.  I pulled a new tube of stockinette over the old tube, just to keep everything nice and tidy.

I tied Rosey's neckline, and it was definitely more firm, but now what?  Rosey's head looked like a giant blob!


I assured myself that I was doing the right thing, and after all, it wasn't as if I had recarded her head.  I had only added more wool to it.  Now, all I had to do was re-tie her shaping lines, starting with her eyeline.  I gratefully used her old eyes as a guide, and tightly tied on a new line, forcing the blob of wool to take shape.  Then I quickly tied the chin line and stitched it to the eyeline.

Now poor Rosey looked like a hot cross bun!


Her eyeline kept slipping down below her old eyes, so I ended up taking a few small stitches to hold it in place.  What else could I do?  I just had to hope that she looked somewhat the same.  And if she didn't, I hoped it wouldn't be the end of the world.  I hoped Sunburst would forgive me.  She's old enough to know that sometimes things don't always work out the way you hope they will.


I measured and sewed a new skin casing for Rosey's head and slipped it on.  There was really no way to gauge how she looked at this point?  Was she still Rosey?  I could feel her old eyes and mouth below the skin with my fingertips, so I pulled out some colored pins and stuck them in.

And then I let out my breath.  She kind of still looked like Rosey.


I needed a second opinion, so I showed her to Ella.  Ella agreed.  There was a hint of Rosey still in there.


I decided to put Rosey aside for Sunburst's approval in the morning, and then I had a look at Ella.  She was definitely not as damaged as Rosey, and so I had been harboring a secret hope that fixing her would be easier.  Simple, even.  Maybe I could just use the advice from my doll book and just lay some new fabric over her old face?


No.  It was immediately obvious that it wasn't going to work.  All the holes in her old skin showed right through that new fabric.  So I thought maybe I could just cover up those holes with some new fabric, and then it would work.  Nope.  That looked even worse.  The contrast between her old skin and the new skin showed completely through the new skin.  I would have to do something else... but what?  I didn't yet know.

First thing was first.  Her holes needed to be mended, especially the one at her nose.  When I made Ella, I gave her a nose.  The directions in my book said that to keep the shape of the nose, you should add a little glue to it.  She looked awfully cute at first, but not even a year had passed before her nose wore right through the fabric.  There was no way I was going to remake her nose so it could tear through her face again, and I had already told Moonshine as much.  She only frowned for a minute, but then readily agreed.  Ella 2.0 was going to be nose-free and hole-free.

So I wasn't giving Ella a new nose, but I still had to fix the damage that her old nose had created.  Rather than stitch the two holes in her face, I decided to just to worry about making them less two-tone.  New fabric wasn't going to do it, so I decided to graft some skin from her old body.  I cut pieces of her old arm fabric and placed them so that the edges of her old face skin overlapped them.  Tone-wise, it was much better match!


Now I just wanted to create a smoothness to her face that would hold the old skin in place, so I carefully pulled another stockinette over her head, leaving everything just the way it was.  Now Ella looked a little like she was ready to rob a bank.  I decided to give her another eyeline, just over this last layer.  I tied it on and stitched it down so it wouldn't slip below her eyes, and then sewed up another skin for her.


 The next time the girls saw their dolls, they looked something like this:


I wasn't so sure about Rosey.  Her head still has a bit of creasing I'm unhappy with at the chin and neck, but then again, so did the original Rosey.  Otherwise, did she look enough the same?  Sunburst thought it was good enough, and so I sewed their arms and heads onto their bodies, stab-stitched the lines at their thighs and feet, and moved on to the embroidery phase.

I decided to tackle Ella first, because honestly, she seemed easier.  Moonshine picked among the thread colors I had and found what she thought was most similar to the original.  Then she sat and watched every single stitch.  It was nerve-wracking for me, but I imagine I would have wanted to be present if my child was getting a new face, too.

I could feel her old stitches underneath, so it wasn't as hard as it could have been.  I made sure to keep her eyes a little bit too far apart, as I had originally.  Moonshine reminded me that they weren't supposed to match-- one was more almond-shaped and one was more round.  By no means was I to fix them-- she wanted them exactly as they were!

As soon as I had a face on Ella, Moonshine couldn't wait to see what she looked like with hair.  And with the hair on her head, she looked... well... more than just a little like Ella.  She looked almost exactly like Ella!


Moonshine was overjoyed!  She couldn't stop staring at her and smiling!


Next I moved on to Rosey and repeated the process with Sunburst, who also painstakingly selected the embroidery colors and watched every stitch.  I wasn't completely happy with the results, but Sunburst was.  She begged me to stop exactly where I was at that moment and not make one more stitch.

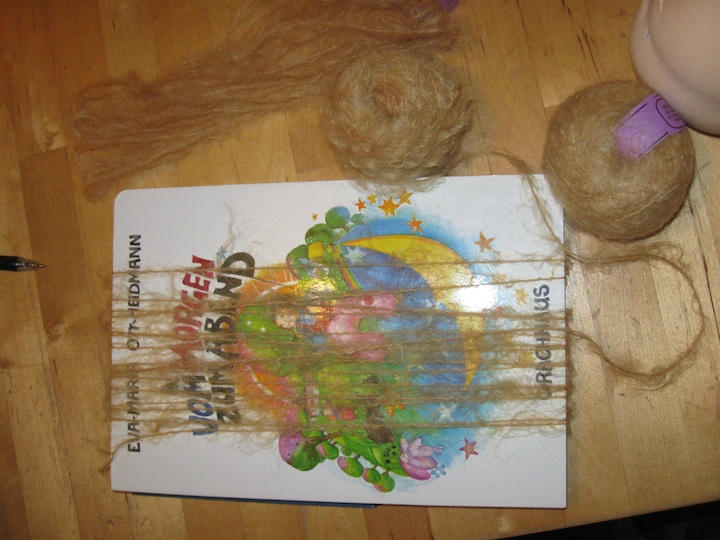
But was it Rosey?  I had been so used to seeing her worn face that honestly, it was hard for me to tell.  I pinned just a bit of new hair onto her head to check?  And still, I wasn't sure.  So then I pinned on the remnants of her old hair just to make sure.

And....


It's Rosey!  98 percent, Sunburst tells me.

And that is as far as we've gotten.  I spent the rest of the weekend sewing doll clothes as a present for Moonshine's birthday yesterday, which turned out to be a smashing success!

For more on that, and to see Rosey's final outcome, you'll have to tune in next time.  Unfortunately, I have a bit more work to do before any of us can know how it all turns out in the end.

To be continued...

For the continuation of this story, please see Part 3.
Related Posts with Thumbnails
 
Site Meter